Prepping with Pumpkins

Pumpkins. They’re the symbol of Halloween, Thanksgiving, and all things fall-related. And even in my cold, dry part of the country, they’re all over the place because they’re fairly easy to grow.
DIY Pumpkin Puree
Oftentimes, people grab canned pumpkin from the store because they’re not sure how to turn their cute fall decoration into a pie. While there’s nothing wrong with canned pumpkin, why not use something that is so abundant as pumpkins in the fall? I have heard plenty of people say that they can’t get the same texture from fresh pumpkin that you do from canned. I have been growing and using pumpkin for years, and I’d like to show you what I do to get pumpkins from my garden to behave exactly like canned pumpkin in recipes.
Cooking the Pumpkin
Start by cooking the pumpkin. I’ve seen cookbooks say to cut the pumpkin into pieces, put foil over it, and then put water in a pan to steam. You can do that.
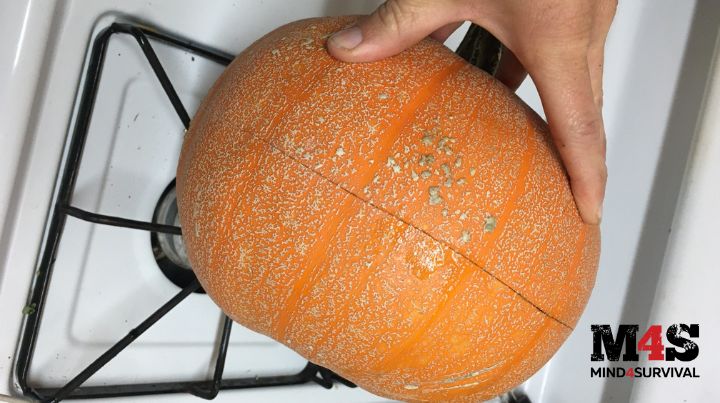
But I like to avoid work wherever possible, so this is what I usually do. I slice a pumpkin most of the way around the middle. I can check if it’s still good on the inside, but then roast it like this because the moisture inside the pumpkin will steam it. The large slice around the middle lets steam escape; if you don’t cut the pumpkin at all, you’ll have an explosion. You really do need a very large incision.
With my small oven, I typically remove one of the oven racks. I put the pumpkins onto a cookie sheet. You want to put them on something to catch the juices that will come out.
After preheating the oven to 350ºF, I put the pumpkins in and roast, usually for about 2.5 hours. Larger will take longer; smaller, shorter. If you are unsure of the time, just stick a fork in. You want the pumpkin to be nice and soft.
Once the pumpkin is done cooking, it will probably look semi-collapsed.

Processing the Pumpkin
Once it’s cool enough to handle, scoop out the seeds in the middle. You could dry, roast, and eat those yourself, feed them to chickens, or add them to your compost heap.
Then, scoop out the flesh and put it in a food processor. You don’t need a crazy-fancy processor to blend pumpkin well. I’ve got a Cuisinart I picked up more than ten years ago. Puree the pumpkin, and then strain it.
To strain it, put a colander over a bowl. Then, put cheesecloth in the colander. Pour in the pumpkin puree and wrap in the cheesecloth.
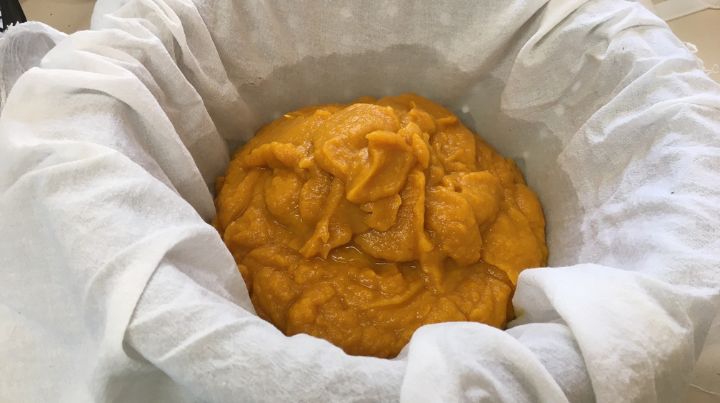
To press out the pumpkin juice, put another bowl on top and weight it down with something heavy. You can use just about anything to do this. Last time I used a large jar of chickpeas.
And then wait. You might need to pour out the juice a few times; some pumpkins can be pretty watery. I usually wait an hour or more if I can see that juice is still coming out.
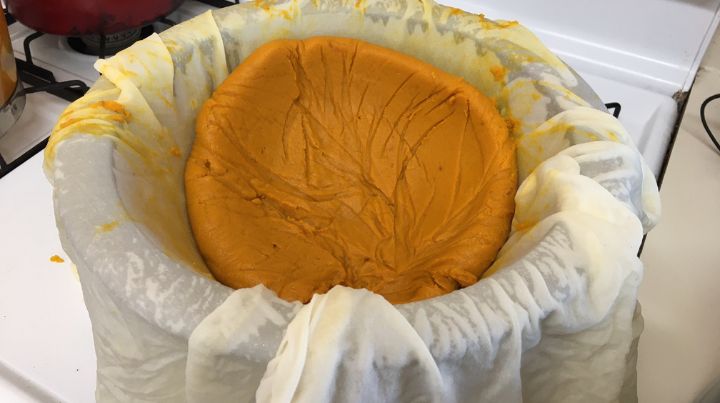
Once most of the excess moisture has drained out, look at the puree.
You can see that now, after being pureed and drained, it looks like the canned pumpkin you’d buy at the store. At this point, I either use it or freeze it. It keeps quite well and takes up less space in the freezer than pumpkin chunks.
Is It Worth the Work?
This may sound like a lot of work. It is time-consuming, though much of that time is simply waiting for the pumpkin to be done cooking or draining. However, you end up with many cans’ worth of pumpkin.
If you’re used to using only one or two cans of pumpkin a year for a couple of pies around the holidays, you may be wondering what to do with so much pumpkin puree. Fortunately, pumpkin can be added to all kinds of recipes. I used to buy pumpkin bagels at the store until I realized I could make pumpkin pancakes and have those for breakfast instead.
Some of my family’s favorite pumpkin recipes are:
Final Thoughts
We’ll all be drowning in pumpkins for the next couple of months. Why not make use of them? These instructions will help you turn those fall decorations into an easy-to-store, ready-to-use ingredient for the rest of the holiday season. Or the rest of the year, depending on how much you love pumpkin!
Additional Resources:
- Meat Storage for When There Is No Freezer
- Is a Home Freeze Dryer Worth the Investment?
- Prepper Trick or Treat Tips
- What To Do With Your Excess Harvest
Don't Miss Out!
Join the thousands of people who rely on Mind4Survival preparedness advice by subscribing to our FREE newsletter.
- Practical preparedness information
- Zero Spam
- < 0.25% of people unsubscribe


Join Mind4Survival!
Stay informed by joining the Mind4Survival! 100% Secure! 0% Spam!
Follow Us!
Affiliate Disclosure
Mind4Survival is a free, reader-supported information resource. If you make a purchase through our link, we may, at no cost to you, receive an affiliate commission.
Thanks Marie…….I’ll def be doing this with at least a few pumpkins. Never thought to press out the liquids…duh. Snagged two recipes that you posed and both need a 15 oz can, so I’ll be portioning my pumpkin in 2 cups per bag.