Easy DIY Water Storage for Frugal Preppers

Prepping can cost a lot of money, but one part doesn’t have to: WATER. While it’s not especially glamorous, it’s probably the most important prep you can have because you can only survive 3 days without it. (And after the first day without it, you’ll be suffering greatly). Here’s how frugal preppers can easily create DIY water storage on a dime.
Drinking, Hygiene, and Sanitation Water Supplies
First, it’s important to note that you need not only water for drinking, but also for hygiene and sanitation. The supplies have different standards. Drinking water must be free from chemical, bacterial, and viral contaminants. But water for hygiene doesn’t have to be held to quite the same rigorous level of potability, depending on what you’re using it for. Obviously, you don’t want to use highly contaminated water for bathing or washing dishes, but it won’t matter at all if you’re pouring it into the back of the toilet tank so you can flush it into your septic system for sanitation.
Water that touches your skin doesn’t have to be quite as pure as drinking water, but it can’t be toxic. So, if you have a relatively clean stream running behind your home and you want to take a quick dip to bathe, that is generally safe. On the other hand, if you have a swimming pool in which the filter hasn’t been running and it’s filled with algae and other stuff, that’s not a good idea for personal hygiene but it could still be used for sanitation.
Also, in many cases, the supply you stored for hygiene can often be purified and used for drinking.
DIY Water Storage Containers
What you store your water in depends on what you’re using that water for during an emergency.
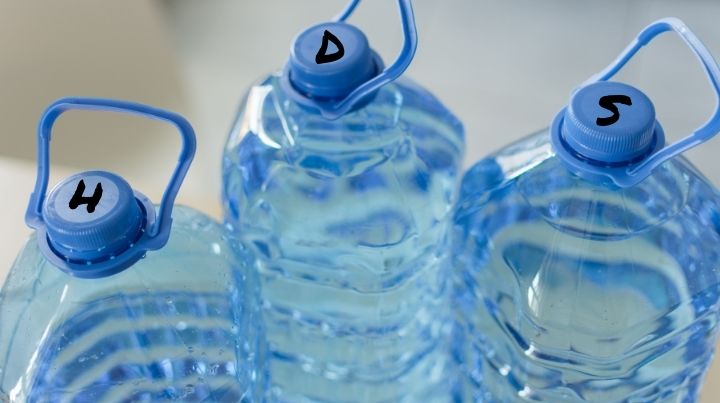
Water for sanitation and hygiene does not have to be stored in food-safe containers. If you’re storing sanitation, hygiene, and drinking water in similar containers, be sure to mark the cap with a D, an H, or an S to indicate the purpose of the contents.
So, what kind of vessels are safe DIY water storage containers for drinking? If you’re reusing containers, steer clear of anything that held milk or juice. According to FEMA, “milk protein and fruit sugars cannot be adequately removed from these containers and provide an environment for bacterial growth when water is stored in them.” And the last thing you want during an emergency is a waterborne illness. Reusing 2-liter soda pop bottles or bottles that originally contained water is a safer option. If you don’t drink soda pop, ask friends or co-workers to save theirs for you to get a free stash.
How to Sanitize Your Containers
Before filling your used drinking water containers, you’ll need to clean them. The Centers for Disease Control and Prevention offers the following guidelines.
- Wash the storage container and rinse completely with water.
- Sanitize the container with a solution made by mixing 1 teaspoon of unscented liquid household chlorine bleach in 1 quart of water. Use bleach that contains 5%–9% sodium hypochlorite.
- Cover the container tightly and shake it well. Make sure the sanitizing bleach solution touches all inside surfaces of the container.
- Wait at least 30 seconds and then pour the sanitizing solution out of the container.
- Let the empty sanitized container air-dry before use OR rinse the empty container with safe water (water that has been treated).
Generally, to save time, I wait until I have a number of containers to clean before going through this process.
Where Does Your Water Come From?
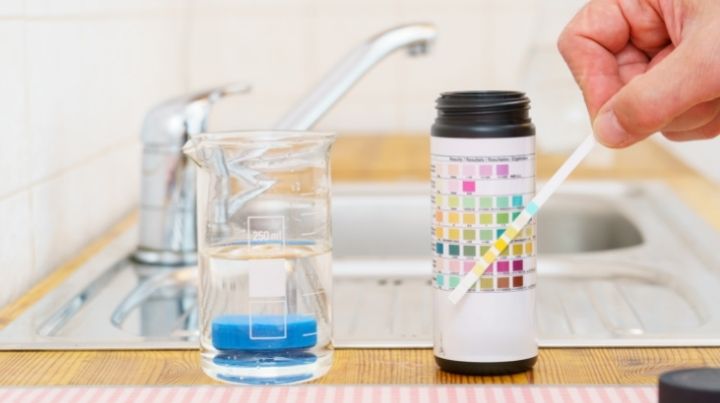
What you do to treat your DIY water storage depends on where you obtained it and what it contains. It’s a good idea to test what flows from your faucets to see exactly what’s in it. Don’t rely on your municipality to let you know whether it’s tainted or not. Just ask the people of Flint, Michigan.
Here’s a testing kit that you can use to have your own water tested. As a prepper, be sure to get the test kits that you can read yourself, not the ones that must be sent out to a lab. In the event of an emergency, you won’t have access to those lab results.
Chemical Treatment for DIY Water Storage
The easiest treatment for DIY water storage is plain unscented household bleach. Boring, cheap, and simple.
It’s particularly important to treat your supply if you have well water. Add a splash of regular unscented household bleach to each container. The rule of thumb is 2 drops of bleach per quart.
If you have municipal water, it’s already been treated. You don’t need to add additional bleach, but you can if it makes you feel better about your supply.
The Bottom Line on DIY Water Storage
By doing it yourself with re-used containers, you can build a water supply almost for free. Different containers can hold water for different purposes. Always mark your containers clearly so others know which supply is potable, which is for personal hygiene, and which is for sanitation.
How do you store water? Do you have some money-saving tips? Please let us know about them in the comments.
Don't Miss Out!
Join the thousands of people who rely on Mind4Survival preparedness advice by subscribing to our FREE newsletter.
- Practical preparedness information
- Zero Spam
- < 0.25% of people unsubscribe


Join Mind4Survival!
Stay informed by joining the Mind4Survival! 100% Secure! 0% Spam!
Follow Us!
Affiliate Disclosure
Mind4Survival is a free, reader-supported information resource. If you make a purchase through our link, we may, at no cost to you, receive an affiliate commission.
I buy laundry soap in the 1.51 gallon containers, when empty, I rinse once, fill with tap water & store outside, northside of a building, cover with a tarp. Line 6 for bottom row, use cement blocks, 2×6 used board and stack another row. This water is for sanitation only. I have already paid for the container, so why not refill with water & store? Prepping space is critical, money is used wisely, so you have to get creative. So a little soapy water in my 5 gallon bucket toilet is a good thing. Repurposed items is a must, money saved. SLS
I use the 20 lb. plastic kitty litter containers for emergency water for toilet flushing when the grid goes down.
Don’t forget bathtubs for extra temporary water storage. We fill one of ours any time a hurricane forms in the gulf!
Filling your bathtub for temp. Emerg. Water supply is a good idea, if you can find them, a bathtub water bob will afford you clean drinking water for emergencies. Holds 100 gallons, comes with a hand pump. No need to sanitize your tub which you should boil the water before consuming. The water bob is quick and easy. After the emergency passes, use the remaining water for your garden without any water purification damage to plants/ soil. Stay safe.
For water use, except drinking, get galvanized metal trash cans. Line them with heavy duty lawn & leaf bags. Place in an out of the way location in your garage, or against the South side of your home. If outside place on blocks. Fill and check water level a couple of times a year.