Prepper Skills: Soapmaking 101

Shrinkflation has hit everything, including some of my favorite cleaning supplies. I don’t have a dishwasher, so when the brand of dish soap I’ve been using my entire adult life suddenly wasn’t getting dishes as clean, my children and I noticed right away.
Having to squirt one and a half times as much soap into the sink won’t break the bank right now, but that could change. In case it does, I’ve got a backup plan: my boxes of homemade soap. I use them in the shower; I give them out as gifts. Homemade soap can be used for anything, including dishwashing.
Learning to make your own soap is not too hard, but it’s not idiot-proof, either. It requires working with lye, which is dangerous enough to cause serious chemical burns. I always prepared food with babies in baby carriers; I would never make soap like that. Likewise, if you have toddlers or a rowdy dog, it may not be the right time for this particular homesteading endeavor unless you have a spouse who will keep them busy so you can safely work in the kitchen.
If you think soap-making might be your next step on your self-sufficiency journey, read on to learn more.
Gathering Materials
Making your own soap doesn’t require any particularly expensive equipment. But once you get a batch going, you can’t really stop, so it’s best to make sure you have everything lined up beforehand.
You will need:
- Digital scale (ingredients need to be weighed; measuring cups are not accurate enough)
- Immersion blender
- Two digital thermometers
- Large stainless steel pot (not aluminum!!)
- Two heat-resistant mixing bowls or measuring cups (like Pyrex)
- Two large stainless steel spoons (not aluminum!!)
- Silicone spatulas
- Soap molds
- Rubber gloves
- Goggles
- Tool to cut bars
Aluminum pots and utensils will react with lye; it is really important not to use aluminum while making soap.
You may also want to have wax paper on hand, depending on what kind of mold you plan to use. You can buy super cute gift-type ones, but if you’re just getting started, you can also line a large casserole pan with wax paper and cut into bars at the end. You don’t have to start off spending lots of money.
Safety First
You really do need gloves and especially eye protection. Lye can splatter, and you do not want that touching you. Always add lye to the liquid, not liquid to the lye.
Use distilled water. Chemicals in tap or well water can react with the soap, preventing it from setting properly.
And remember only to make soap in well-ventilated kitchens. My kitchen does not have a stove fan or a high ceiling, so I only make soap on days when I can have my windows open for a cross-breeze. Fumes from the lye can be irritating; plan ahead for safe soap making.
Ingredients
Soap is made with fat, lye, and water. What kind of fat you use is up to you, but you will need to ensure you use the correct proportions. Soap-making books or online recipes can help you get started.
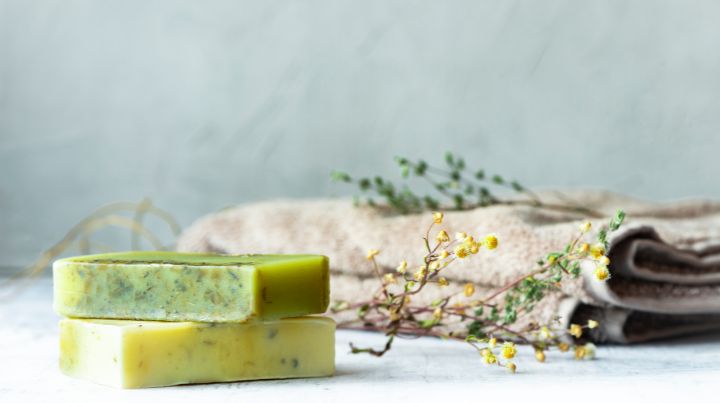
My foray into soap making began when I got pigs processed for the first time and found myself with more lard than I knew what to do with. I knew lard made very high-quality soap, so I did an internet search for soap recipes that included lard. I tweaked the recipe a little bit to add herbs that I had, and this is what I now use most of the time:
- 32 oz. water
- 12 oz. lye (NaOH)
- 64 oz. lard
- 17 oz. olive oil
- 8 oz. coconut oil
- 1 c oatmeal
- ¼ c dried lavender
INS Value
You may wonder why I bother adding the olive oil and coconut oil. The mixture of oils saponify more easily than lard would by itself. This has to do with the Iodine Saponification Number (INS) value. The INS value is a measurement of how hard or soft different kinds of fats will make a soap. If you get to a point where you are designing your own recipes, calculating the INS values of different fats will help you produce a soap with the qualities you want.
This is fairly advanced, though; I don’t design my own recipes. I found a recipe I liked online and stuck with it. However, if this sounds intriguing to you, you can play around with SoapCalc and see what you come up with. I don’t really recommend this unless you are highly motivated and not afraid of winding up with a few batches that don’t set.
Use What You Have
For most people, especially those just getting started, think about what ingredients you have on hand. I have lard because I raise pigs. I learned soap-making from a friend who raised goats and used goat milk. Some people who raise beef cattle make soap from tallow.
You can also buy tubs of coconut and olive oil from Costco and make soap with that. Whenever you make soap yourself, you know exactly what goes into it. Costco coconut oil and olive oil soap may not sound as cool as home-rendered lard soap, but you know what? You’ll be learning a new skill, and your soap will still be higher quality than most of what you find at the store. So, if you’re interested in soap making but don’t have access to large quantities of animal fat, don’t let that stop you.
Anne Watson’s book Smart Soap-making contains numerous great recipes for beginners. The instructions are simple, and her recipes contain ingredients that are easy to find at most grocery stores.
If you have some ingredient (lard, coconut oil, goat milk, whatever) that your heart is set on using, you can do an internet search for “goat milk soap recipe” and start there.
Lye is available at most hardware stores, often in the plumbing section. Make sure you get 100% lye; read the label carefully.
Some hardware stores restrict purchases of lye because it’s also used to make methamphetamine. I’ve never run into a problem at my local hardware store, but if this is a problem in your area, you could always just order on Amazon.
You can also purchase essential oils to add fragrance to your soap, but this is optional.
The Process
You can start making your soap once you have everything lined up and ready.
Start by melting your fats together. Do this at a low temperature over your stove; you don’t want to overheat, only to reach between 90 and 100 degrees F.
Next, you’ll need to prepare your lye/water mixture. To make this go more quickly, work with ice water. As you gently add the lye to the water, the water will heat up. Stir the lye gently as you add it to the water. Once it’s dissolved, take the temperature. If it is too hot (above 100 degrees), you’ll need to wait for it to cool off. You could also put some cold water in the bottom of your sink and place the bowl with the lye mixture in the sink to cool it off. Just make sure you don’t spill anything!
Once the fat mixture and the lye mixture are both between 90 and 100 degrees, you can begin adding the lye mixture to the fat. Do this slowly while using an immersion blender to mix.
Trace Point
Continue to blend the mixture with your immersion blender until you reach the trace point. This is when a small amount of the mixture drizzled across the top will leave a trace before sinking back into the pot.
This is definitely easier to see than to describe. There are a lot of soap-making videos on YouTube, and I’m sure most of them are great. However, most of them are at least ten minutes long because they show the whole process. If you just want to see what trace looks like, look at this one by Tennessee Gun. The video is less than two minutes long and focuses on the trace point. It’s a nice visual.
At this point, you would add any colors or essential oils you plan to use. Once these are blended in, pour the soap into your prepared mold. Place plastic wrap or wax paper over the top of the poured soap for the best appearance. Air exposure won’t hurt the quality of the soap, but it will get a slightly different color from the parts inside the mold, and if you plan to gift soap bars, you’ll want them to look nice.
Drying & Packaging
Let the soap sit on your counter for about 24 hours. The next day, place the soap mold in your freezer for 20 minutes or so, then take it out and pop out the individual pieces of soap. If you use one large mold like I do, let it sit on the counter for another 24 hours before slicing into little bars.
Once the soap is in the desired shape, let it cure for three weeks or so before using. This will allow the bars to harden and ultimately last a lot longer. You can cure them by just putting them on a drying rack and staggering the bars so that they have some airflow.
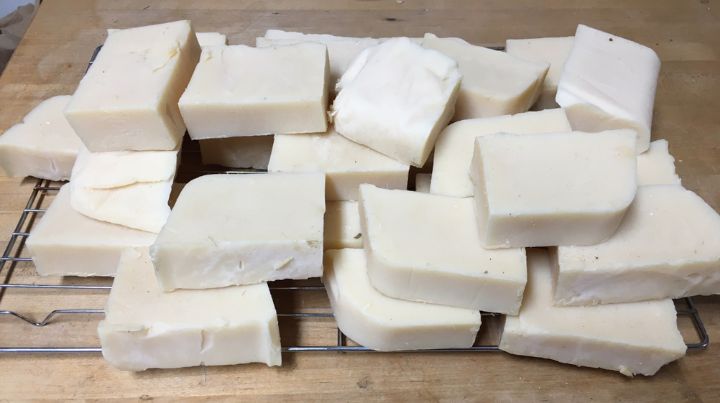
Marie’s homemade soap bars
Final Thoughts
Learning to make soap from an experienced friend is ideal. However, if you are the first person in your circle of acquaintances to develop an interest in soap making, there are also a lot of great videos on YouTube if you are a visual learner. Hopefully, this article has helped you decide whether or not soap-making is a good project for your household.
Making your own soap is a great skill. When I bought my house, I found a box of soap in my cellar left by the previous owner, who died in 2007. If you butcher animals, turning their fat into soap is a great way to make a valuable part of the animal shelf-stable for many years.
Even if you don’t butcher animals, taking care of yourself is important, as Brian discussed recently, and staying clean is a big part of that. People always think of beans and bullets when it comes to prepping, but basics like staying clean after SHTF events should be prioritized, too.
Having a large supply of high-quality soap on hand will help you achieve that.
Finally, mastering skills such as these gives you confidence. We can’t control much in this world, but we can control our mindset and how we see ourselves. As Brian recently noted, whenever you set out to better yourself by improving your capabilities, you become less vulnerable, more prepared, and more resilient. Developing new skills to improve the lives of your family members is part of that.
Additional Resources:
Don't Miss Out!
Join the thousands of people who rely on Mind4Survival preparedness advice by subscribing to our FREE newsletter.
- Practical preparedness information
- Zero Spam
- < 0.25% of people unsubscribe


Join Mind4Survival!
Stay informed by joining the Mind4Survival! 100% Secure! 0% Spam!
Follow Us!
Affiliate Disclosure
Mind4Survival is a free, reader-supported information resource. If you make a purchase through our link, we may, at no cost to you, receive an affiliate commission.