DIY Food Supply: Grow Your Own Sprouts
")
I love fresh homegrown veggies but can’t garden year-round in my climate. My property is a mixture of mud and ice right now, which means no fresh green things unless I get them from the store. I’d love to build a greenhouse someday, but that won’t be in the budget any time soon. Luckily, I’ve found a different way to get some fresh, green, homegrown vegetables in the dead of winter. A friend recently gifted me a set of sprouting trays! Read on to learn more about how to grow your own sprouts!
The Setup
I received the FiGoal 4-Layer Sprouting Tray. If assembled per the exact instructions, this is a great little device. Looking through the reviews, the negative ones came from people who did not heat the joints prior to assembly. If you follow the instructions very carefully, you’ll find yourself with a nice stacking tray unit.
This particular sprouting tray is out of stock at the moment. I hope it comes back soon; it’s great. However, if you’re interested, you can browse through similar items. This SunPro Sprouting Tray is almost identical. You’ll find most of them work in a similar fashion.
There is a white tray with holes in it that looks like a colander. It fits over the green tray, which holds a small amount of water. Then, there are covers you can use to keep the seeds moist.
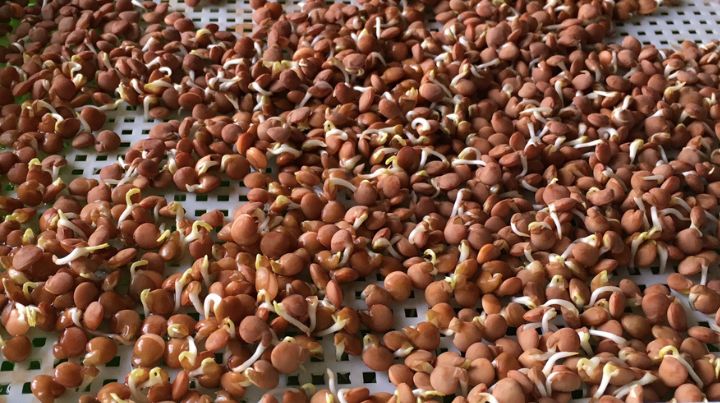
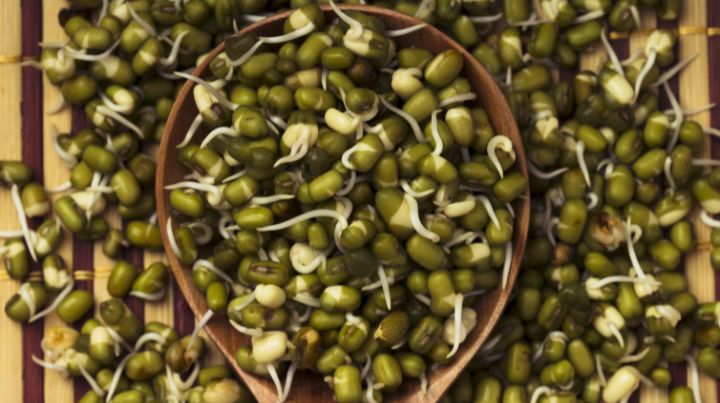
Marie’s beans just after they’ve sprouted
Grown Your Own Sprouts: The Process
You begin by soaking 50-60 g of seeds for 8 to 12 hours.
As we mentioned in a previous article, sprouts are one of the foods most commonly associated with salmonella. However, there are steps you can take when growing them yourself to minimize your chances of getting any kind of foodborne illness.
For starters, only work with clean trays. Hand wash them with dish soap. Wash them between each round of sprouting and dry them thoroughly before using them again.
Picking up some kind of sickness from sprouts can either occur from improper storage or start with contaminated seeds. Harvesting the sprouts within a day of when you plan to eat them and then storing them in the fridge rather than on the counter will slow down bacterial growth. When people get foodborne illnesses from lettuce or sprouts, it’s often because the vegetables have been sitting for too long in a moist environment. One of my favorite things about growing sprouts is that, since they’re ready to eat in about a week, it’s relatively easy to plan when you’ll use them.
To further reduce your chances of foodborne illness, you can sanitize your seeds by mixing two tablespoons of apple cider or distilled white vinegar into your soaking water for fifteen minutes before rinsing and spreading the seeds on your sprouting tray.
I highly recommend this. Most seed sellers assume their seeds will go in the ground rather than be eaten as fresh sprouts. You can’t assume seeds are free from the trace amounts of soil and fertilizers that could make you sick.
After that initial soaking, spread them in the white tray as evenly as possible. Pour water into the green tray, set the white tray over the green tray, and then cover.
Don’t keep your sprouts in the kitchen. Why? Because when you cook, things splatter, and again, sprouts are prone to picking up bacteria that can make you sick. Put the trays in a place with minimal possibility of getting sprayed or splattered by other foods.
Keep the seeds wet by misting them with water from a spray bottle. How often you need to do this really depends on your climate. I’m in a fairly dry region; I’ve found I need to mist the seeds three or four times a day until they sprout enough for the little roots to reach down to the water in the green tray. People in humid regions probably don’t need to mist so often. Just check on them every few hours to make sure the seeds are moist until you get a good idea of how often you need to mist them. After a few days, little roots will start to emerge. As soon as you see some green, uncover the sprouts and expose them to sunlight for about three hours a day. After a week or so, they’ll be ready to harvest.
How long this takes, precisely, will depend on the warmth of your house. My house is typically between 60 and 65 this time of year, and it takes seven or eight days for my sprouts to reach the size I want. If you have a warmer house, you probably won’t have to wait so long.
Health Benefits
Sprouts have a variety of health benefits. They contain high amounts of folate, magnesium, phosphorus, and vitamin K. They also assist digestion since sprouting seeds makes their fiber more bioavailable.
Multiple studies have also shown that sprouts can help lower blood sugar levels, though scientists are quick to point out they’re not sure why. Evidence shows that sprouts can boost the immune system, improve metabolic rates, prevent anemia, reduce blood pressure, and boost energy levels.
The fiber content of sprouts means they’re relatively filling compared to their calorie count. Their texture makes them a good substitute for a variety of less-healthy snacks. I’m a big salty-savory-crunchy lover; I can get out of hand with potato chips. Sprouts tossed in a little vinegar and salt satisfy those cravings for me.
Most websites are quick to point out the food poisoning danger with sprouts. You can minimize this by cleaning the seeds beforehand, rinsing the sprouts immediately before eating them raw, and eating them soon after harvesting. You can also cook them briefly to destroy bacteria like E. coli or salmonella.
Final Thoughts
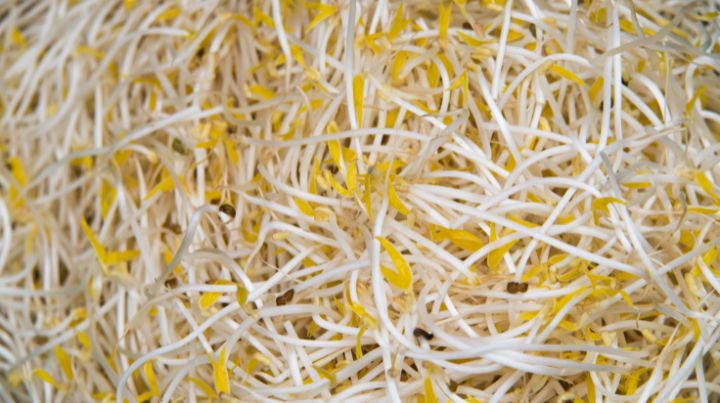
Having fresh green vegetables year round, without relying on imports, isn’t easy for us all. Sprouts are a fun way to change that. They add texture to sandwiches, and if you’re into Asian stir-fry recipes, adding sprouted mung beans will make your recipes a lot more authentic.
As with so many other homesteading endeavors, they’re a great project for kids. Small children can learn about seed development. Teenagers probably know all about growing plants already, but they devour everything in sight, and, again, sprouts are far preferable to most other ready-to-eat snack foods.
There are a variety of reasons to have a relatively short food chain, and we discuss them quite a bit on this website. Thirdworldization is a concept most readers are probably familiar with. The more we can provide for ourselves in the face of this, the better.
Finding projects to supplement our diets in a healthy way is enjoyable for its own sake, too. Quality food is one of life’s simple pleasures, and having fresh vegetables year-round is part of that. I’m sure I’ll clean and store the sprouting trays as soon as my lettuce and asparagus begin popping up in the garden, but that’s still a few months away. In the meantime, I’ll enjoy my sprouts!
Additional Resources:
- Edible Landscaping: Food Hidden in Plain Sight
- Pre-Season Garden Preps
- CSA Farmshares: Could One Be Right For You?
- Poultry Primer: Adding Backyard Chickens to Your Preps
Don't Miss Out!
Join the thousands of people who rely on Mind4Survival preparedness advice by subscribing to our FREE newsletter.
- Practical preparedness information
- Zero Spam
- < 0.25% of people unsubscribe


Join Mind4Survival!
Stay informed by joining the Mind4Survival! 100% Secure! 0% Spam!
Follow Us!
Affiliate Disclosure
Mind4Survival is a free, reader-supported information resource. If you make a purchase through our link, we may, at no cost to you, receive an affiliate commission.